Day 35: Step-by-Step Guide to Setting Up AWS Route 53

As a Solution Architect, I am responsible for designing and implementing scalable, secure, and efficient IT solutions. My key responsibilities include:
🔸Analysing business requirements and translating them into technical solutions. 🔸Developing comprehensive architectural plans to meet organizational goals. 🔸Ensuring seamless integration of new technologies with existing systems. 🔸Overseeing the implementation of projects to ensure alignment with design. 🔸Providing technical leadership and guidance to development teams. 🔸Conducting performance assessments and optimizing solutions for efficiency. 🔸Maintaining a keen focus on security, compliance, and best practices.
Actively exploring new technologies and continuously refining strategies to drive innovation and excellence.
Introduction
Amazon Route 53 is a scalable and highly available Domain Name System (DNS) web service designed to provide reliable and cost-effective ways to route end users to internet applications. In this blog post, we’ll go through a step-by-step hands-on guide to using Route 53.
Step 1: Register a Domain
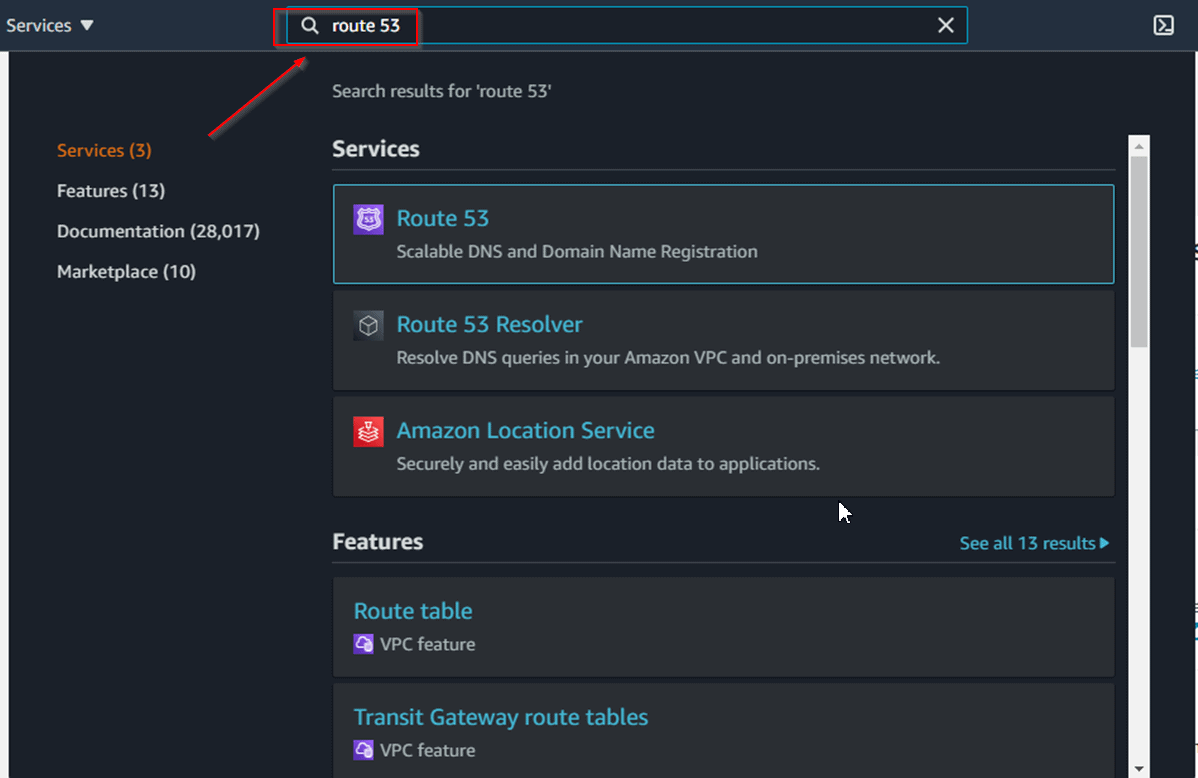
Open the Route 53 Console:
- Sign in to the AWS Management Console and open the Route 53 console at https://console.aws.amazon.com/route53/.
Navigate to Domain Registration:
- In the left navigation pane, click Registered Domains.
Register a New Domain:
Click Register Domain.
Enter the domain name you want to register and check for availability.
If the domain is available, follow the prompts to complete the registration process, including entering your contact information and payment details.
Step 2: Create a Hosted Zone
Navigate to Hosted Zones:
- In the Route 53 console, click Hosted Zones.
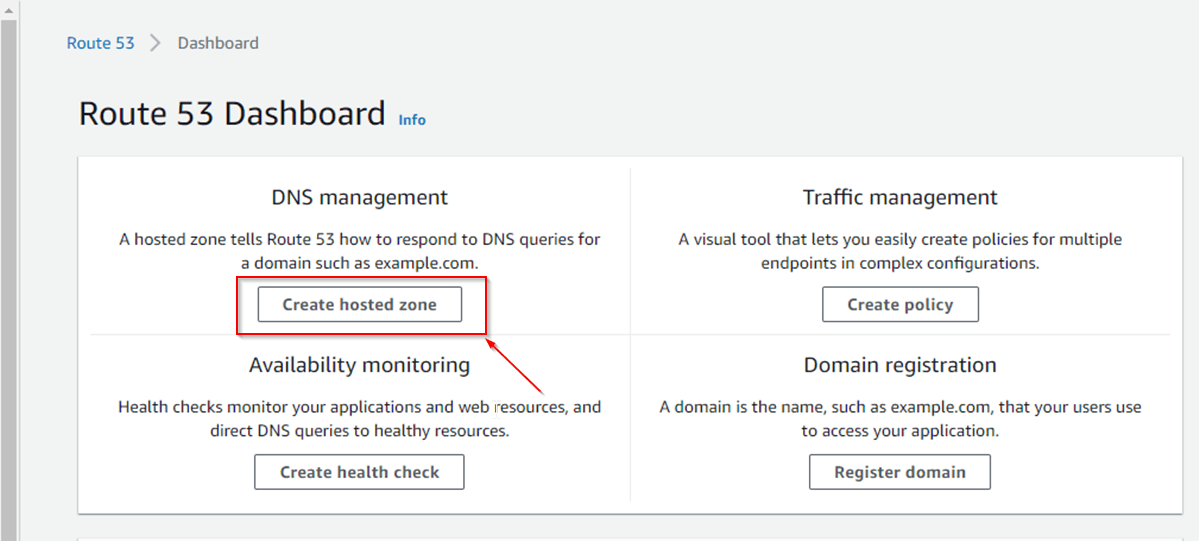
Create a Hosted Zone:
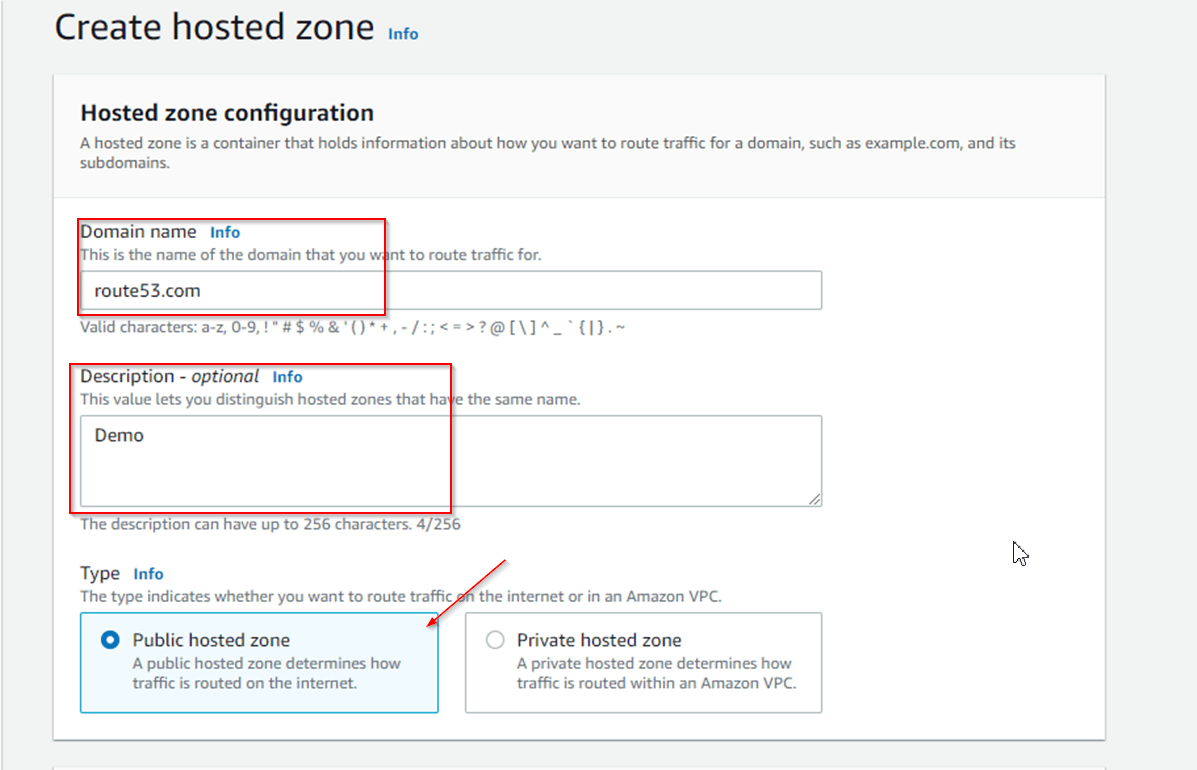
Click Create Hosted Zone.
Enter the domain name you registered.
Choose the type of hosted zone (Public or Private).
Click Create.
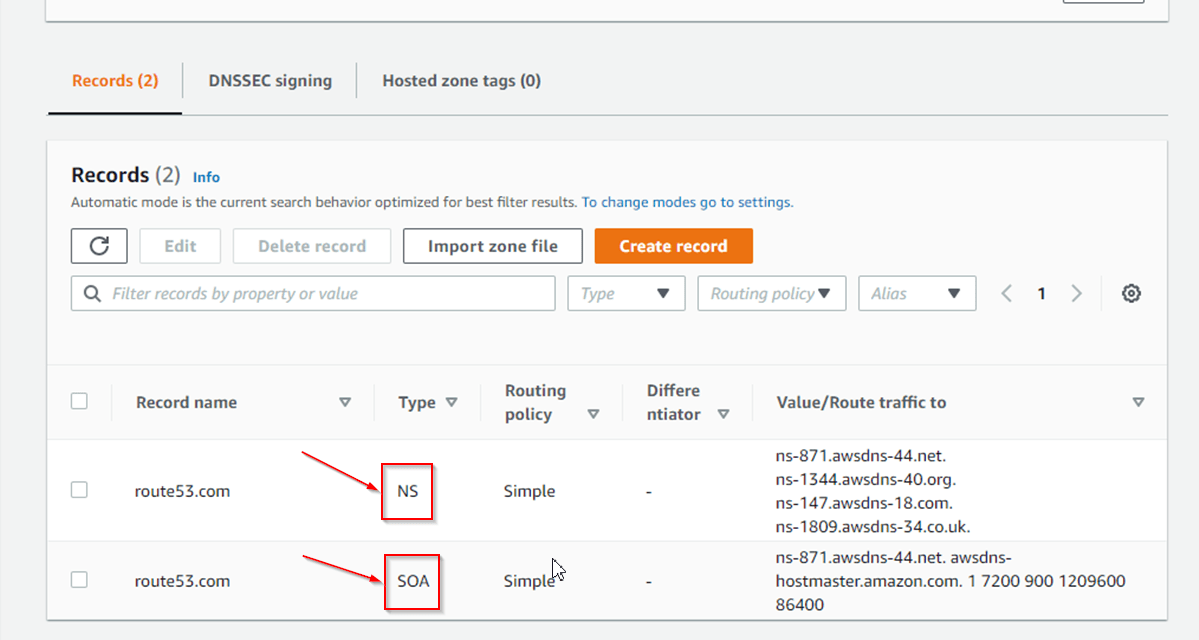
Step 3: Create DNS Records
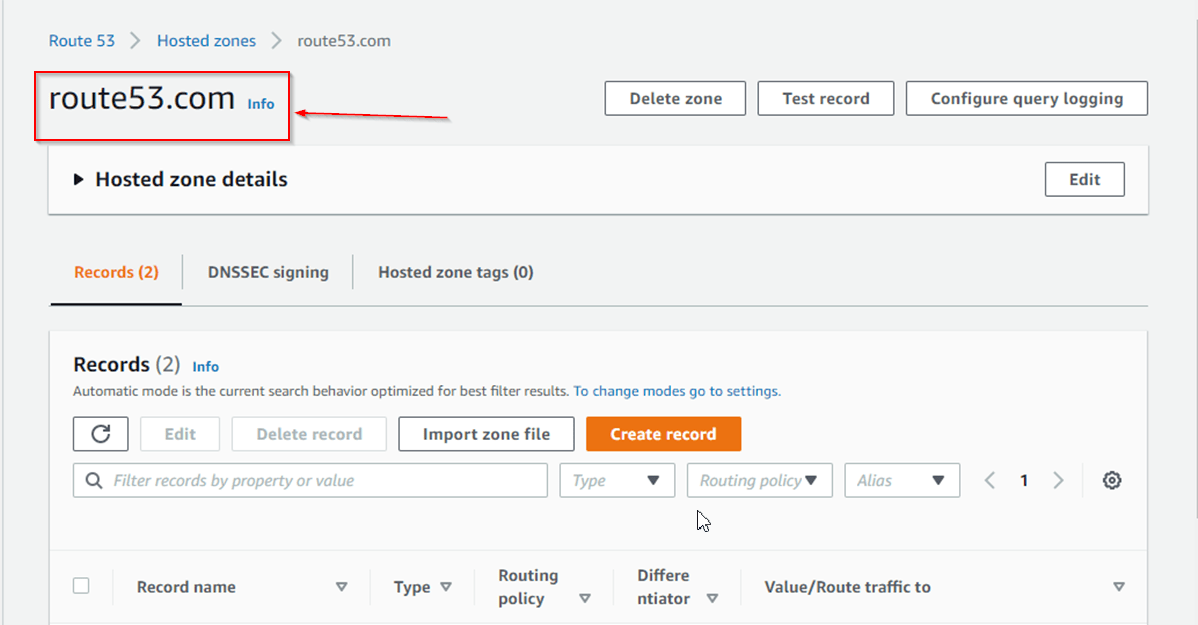
Select Your Hosted Zone:
- In the Hosted Zones section, select the hosted zone you created.
Create Record Set:
Click Create Record Set.
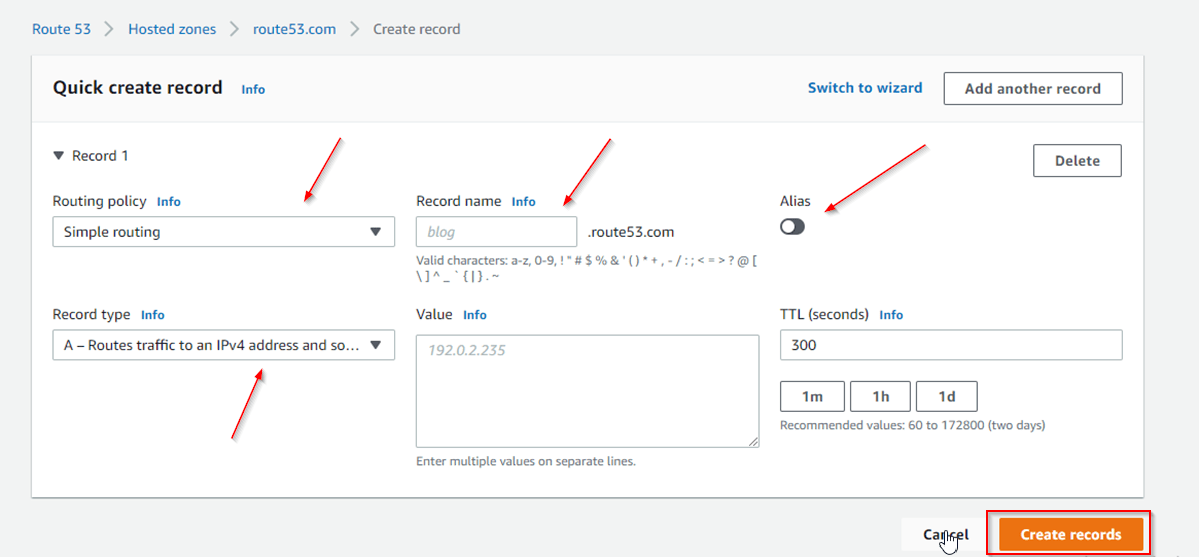
Choose the type of record (A, AAAA, CNAME, etc.).
Enter the necessary values for your record:
Name: The name of the record.
Type: The DNS record type (e.g., A, AAAA, CNAME).
Value: The value of the DNS record (e.g., IP address or domain name).
Configure Routing Policy:
Choose a routing policy (Simple, Weighted, Latency-based, etc.).
Configure additional settings based on the chosen routing policy.
Click Create.
Step 4: Set Up Health Checks
Navigate to Health Checks:
- In the Route 53 console, click Health Checks.
Create Health Check:
Click Create Health Check.
Configure the health check settings:
Name: A name for your health check.
Monitor Endpoint: The IP address or domain name to be monitored.
Protocol: Choose the protocol (HTTP, HTTPS, TCP).
Port: Specify the port number.
Path: Enter the path to check (for HTTP/HTTPS checks).
Set the health check thresholds (interval, failure threshold).
Click Create.
Step 5: Configure Routing Policies
Navigate to Your Hosted Zone:
- In the Hosted Zones section, select your hosted zone.
Select a Record Set to Configure:
- Choose the record set you want to configure with routing policies.
Choose Routing Policy:
Select the desired routing policy (Simple, Weighted, Latency-based, etc.).
Configure the settings specific to the routing policy:
For Weighted Routing, specify the weight for each endpoint.
For Latency-based Routing, specify the region.
For Failover Routing, define the primary and secondary endpoints.
For Geolocation Routing, specify the geographic regions.
Save the changes.

Step 6: Verify DNS Settings
Verify Domain Registration:
- Ensure your domain registration is active and correctly configured.
Check DNS Records:
Use the Route 53 console to verify that the DNS records are correctly set up.
Use external tools (like
digornslookup) to query your DNS records and verify that they resolve correctly.
Monitor Health Checks:
Regularly monitor the health checks configured in Route 53.
Ensure that the health checks are correctly routing traffic based on the health of your endpoints.
Conclusion💡
Amazon Route 53 offers a robust set of features for domain registration, DNS routing, and health checking. By following this step-by-step guide, you can set up and manage your DNS configurations efficiently. Route 53's integration with other AWS services and its flexible routing policies make it a powerful tool for managing internet traffic.
I hope this detailed guide helps you get started with AWS Route 53. Stay tuned for more AWS insights!!⚜ If you found this blog helpful, share it with your network! 🌐😊
Happy cloud computing! ☁️🚀


